the Artful Oven
  • Home
  • Rose's Alpha Bakers
  • Bread Bible Alpha Bakers Bake Along

Jacked Rabbit Cookies: Pepparkakors from The Baking Bible

9/17/2015

7 Comments

 
My beloved Mom-in-law, Sharon, used to make molasses sugar cookies for her children.  Smitty called them Rabbit Cookies because she used Brer Rabbit molasses and there was a picture of the rabbit himself on the bottle.  We still refer to molasses cookies as Rabbit Cookies.

This week's baking assignment was a cookie that hails from Norway called Pepparkakors.  To my American eye, the name looks like the kind of thing that IKEA would put on a shelving unit, but the cookies are GREAT!

The recipe includes black pepper.  However, the variation includes cayenne pepper for even more kick.  I loved that idea, so I made both kinds.  


Smitty calls these "jacked rabbit cookies" because of the pepper.  There are no eggs in this recipe, and the cookies stay nice and flat, unlike regular molasses cookies.  


Next time I am with Sharon, I am going to give her some of these new rabbit cookies. She is going to LOVE them!

Picture
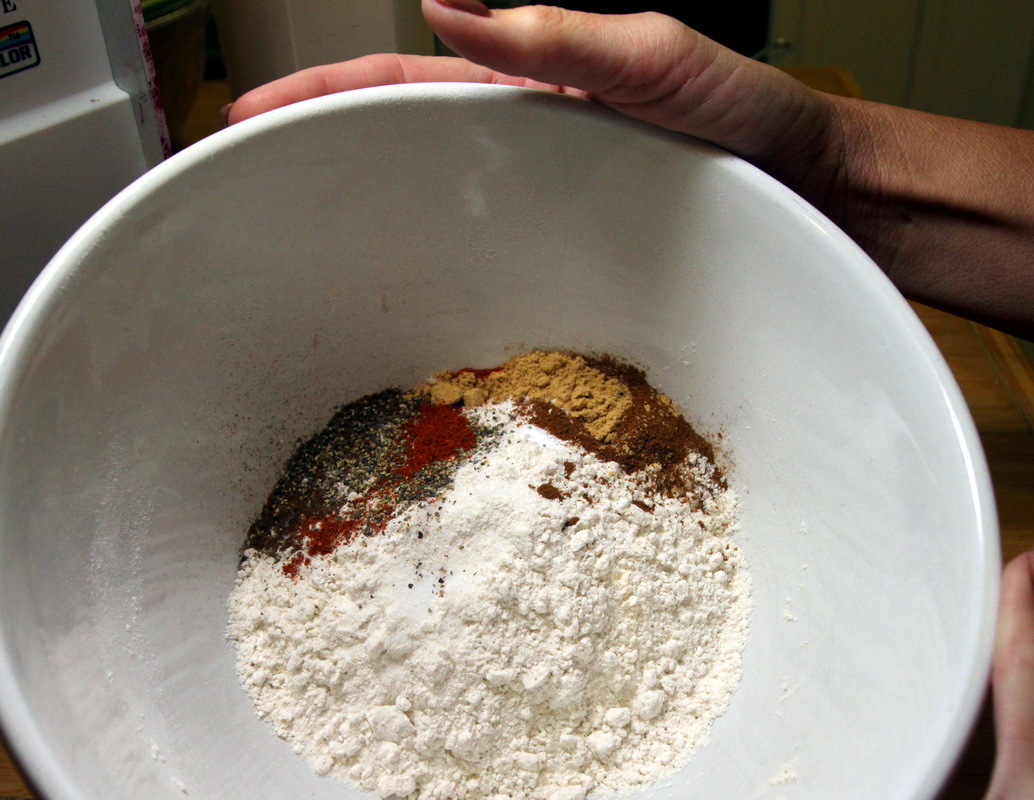
Here are the dry ingredients for the Hot Nick Pepparkakors.  Ginger, cloves, black pepper and cayenne provide a delightful punch.
Picture
Rose's recipe called for Grandma's light molasses, but I can only find regular Grandma's molasses.  


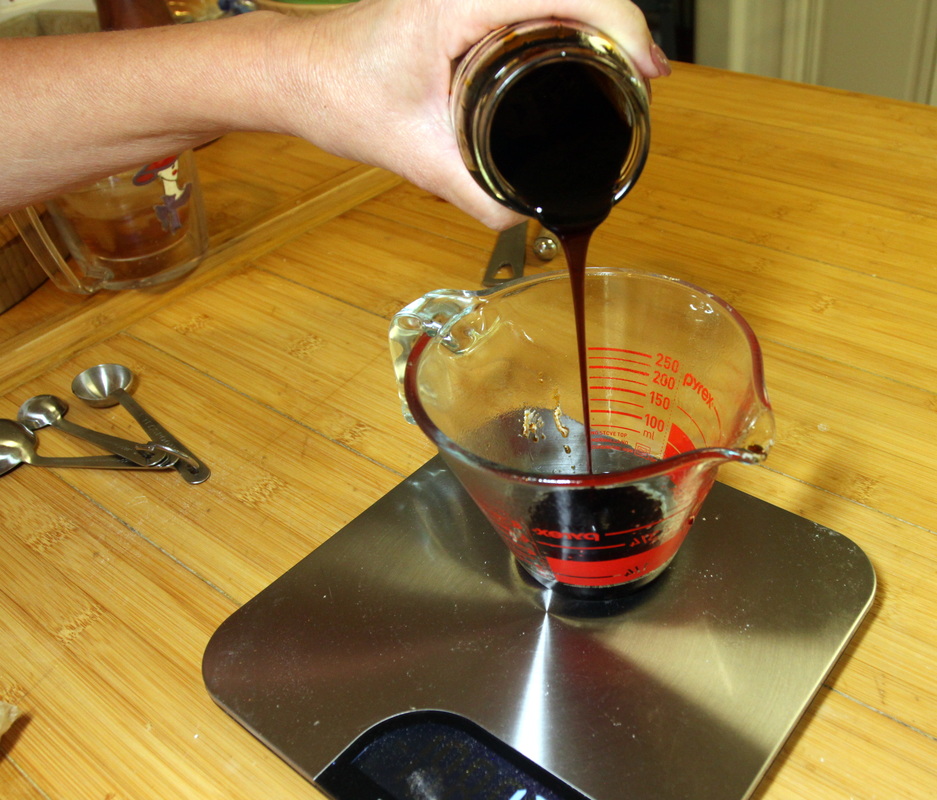
If you are still using volume measurements, by the way, please consider switching to a scale!  It is so much faster, easier and more accurate to weigh your ingredients than to use measuring cups!  Note that this glass cup is sitting on my scale and that I am weighing the molasses.
Picture
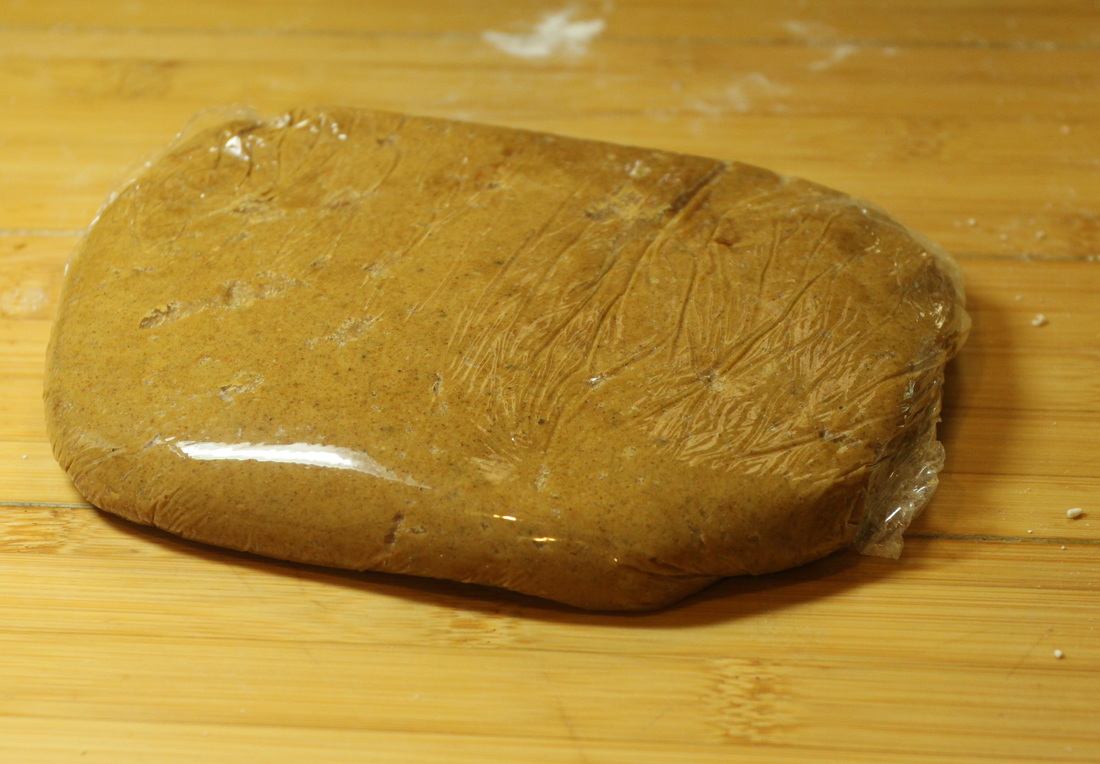
The completed dough is wrapped in plastic, ready for the fridge.  It needs to be thoroughly chilled before the next step.

Picture
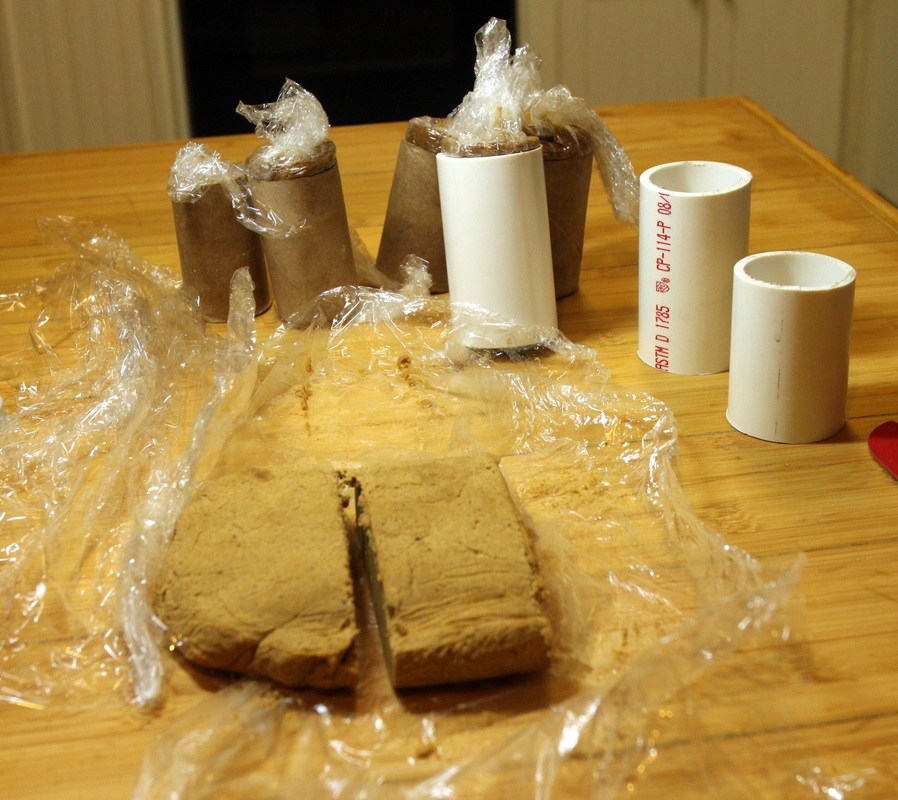
The dough is divided, rolled into logs, wrapped in plastic wrap and stuffed into cardboard tubes or PVC pipes. I had two batches of dough, one of the regular recipe and one of the Hot Nick variation.  It was easy to keep track of which was which--regular in the cardboard tubes, hot was in the PVC.
Picture
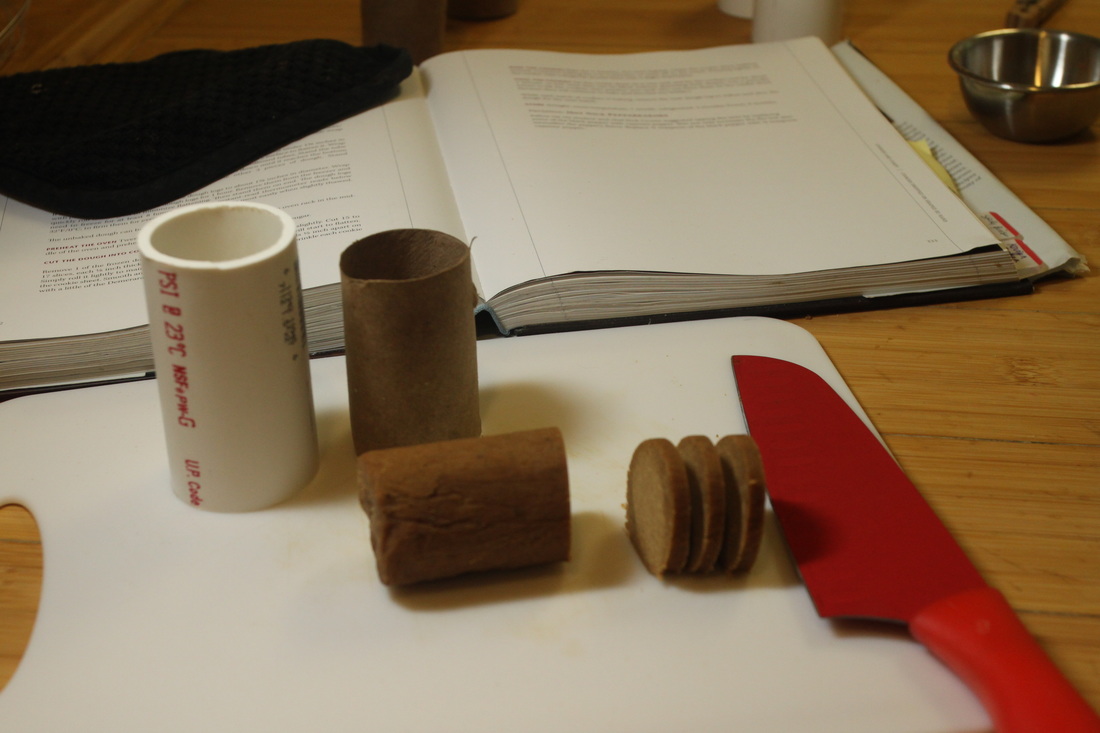
The frozen dough is allowed to defrost slightly, and then sliced into thin wafers.  The tubes kept them in amazingly good shape.  
Picture
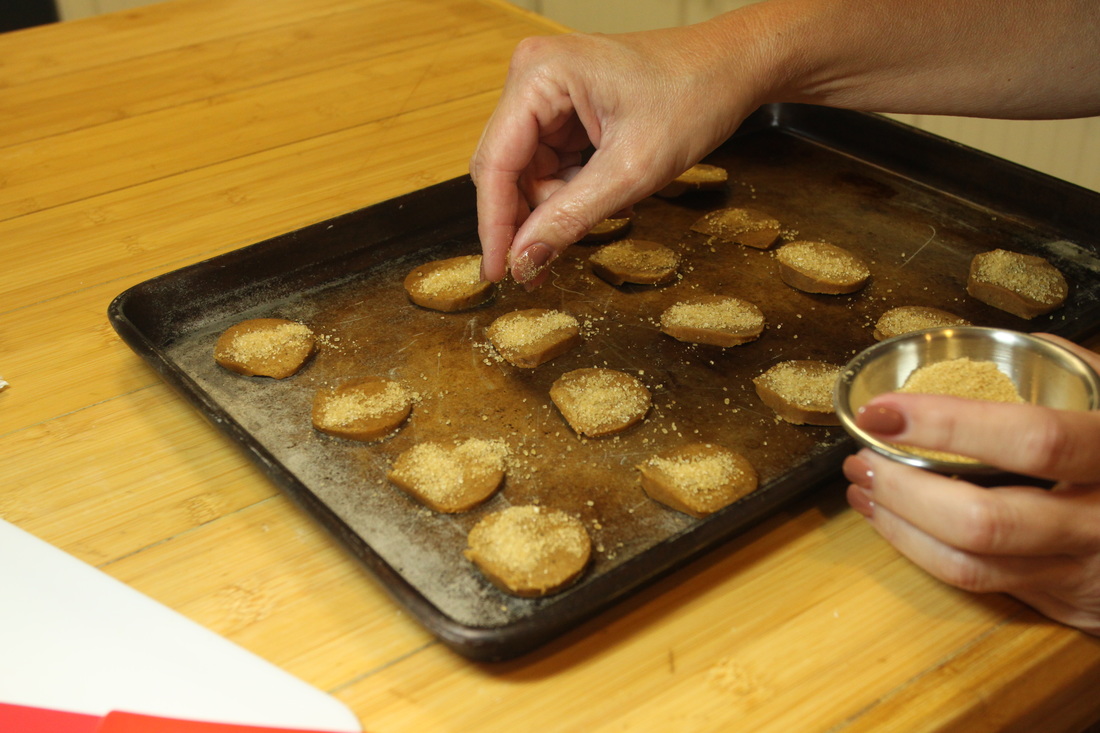
Before baking, the cookies are sprinkled with Demarara sugar, another of those specialty ingredients that I have  discovered, thanks to baking with Rose! The complexity of flavor is amazing.  

I sprinkled the Hot Nick cookies with a combination of Demarara sugar and cayenne pepper.
 
Picture
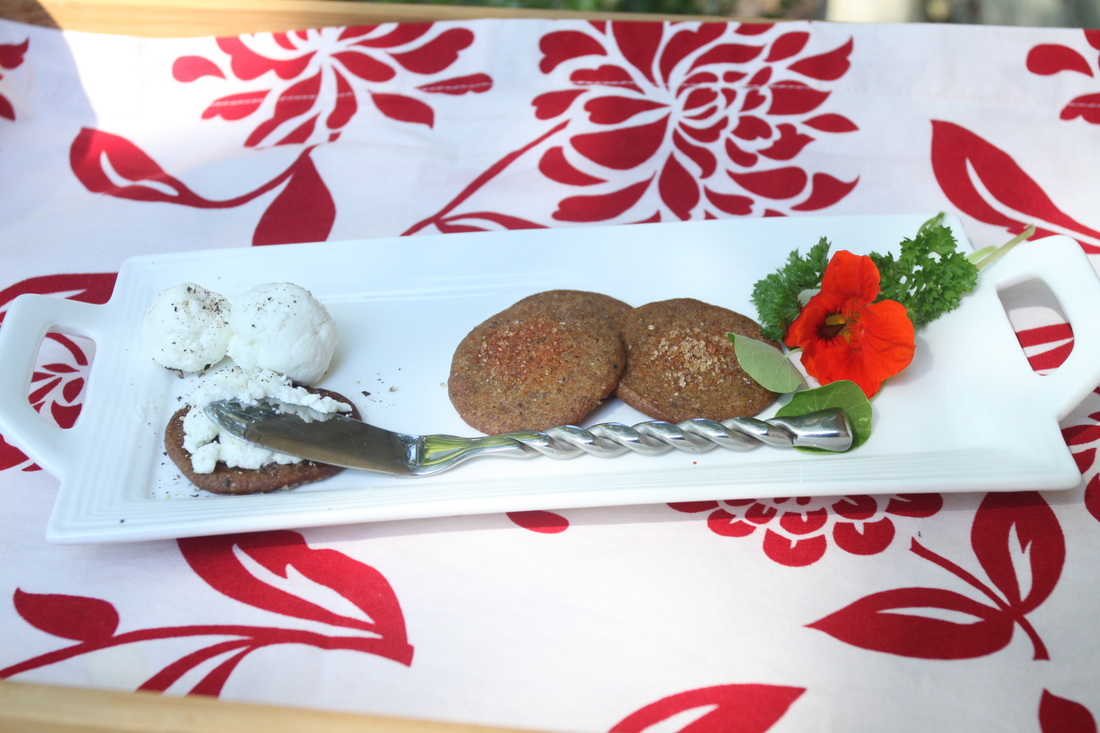
Rose suggested spreading the Pepparkakors with goat cheese.  Here is some plain chevre sprinkled with fresh ground pepper.  You can see the cayenne on these cookies!  

The bottom line:  

These are GREAT!  Smitty is right, these are jacked up rabbit cookies!  We love both variations, but the hot pepper ones are my favorite.  I took the precaution of hiding them away in the freezer lest we nibble them all away.  I want to keep them handy for guests.

These will go on the top of my favorites list from The Baking Bible!  


NEXT UP:  Honey Cake


Thank you so much for visiting my blog and leaving comments!
7 Comments

Apple nostalgia and a luscious pie

9/11/2015

3 Comments

 
Rose's Luscious Apple Pie from The Baking Bible is the latest undertaking by the Alpha Bakers, and it is aptly named!  

First, a note about the nostalgia.

About 18 years ago, I entered a baking contest at a local kitchenware shop.  I didn't win, but I got a one-time discount at the store and purchased an apple peeling-coring-slicing machine.  Back then, it was a relatively new gadget, and it was an expensive purchase for a stay-at-home mother.


While in elementary school, our children celebrated Apple Week every year in October, and our apple machine made the classroom rounds.  Everyone got a chance to peel and slice a big crate of apples.  Afterwards, I took them home and made applesauce for the students to enjoy.  


We had a pet goat during those years.  In a nod to Smitty's love for high performance cars, we named him Turbo.  He was a little black and white Nigerian Dwarf, and he was a wonderful pet!    


Turbo ate bales of hay and kept the weeds under control in the back yard.  His favorite treat was fruit trimmings from the kitchen.  He could smell the strawberry tops, blackberry seeds and trimmings, and peach peels as I walked out to his pen and he would start bleating in excitement before I could even get the bucket under his nose!


I wish I had a photo of Turbo eating long, curly apple peels!  They hung like strings of spaghetti from his mouth, with his little rotary jaw working away on a big tangle of colorful peels.  Every time I peel apples I miss Turbo!


Picture
Smitty operating the apple machine with a Granny Smith apple. It starts...
Picture
Halfway done...
Picture
Peeled, cored and sliced in seconds. It took less than five minutes to process six pounds of apples. You can see what we used to call Turbo's (the goat!) spaghetti in Smitty's left hand! Now it just goes to the compost pile.
Picture
It felt crazy to be baking an apple pie without my daughter Jessica!  She is the celebrated apple pie baker in the family now.  She makes a day trip every year to pick apples at one of the many apple groves in our state's beautiful mountains.  Those apples become delicious pies, homemade applesauce and apple butter.  Jessica is an avid canner, and her pantry is full of homemade sauces and jams.  Can you tell how proud I am of my gifted daughter?

Several years ago I purchased a pricey bottle of boiled cider from King Arthur Flour Company.  It was delicious--a syrupy, concentrated consistency.  It made a big difference in our apple pies.  

When I ran out I wondered why I couldn't just boil my own apple cider instead of buying the expensive version.  Needless to say--I could, and I did, and have been doing it ever since.  

Rose uses fresh apple cider in her recipe, although not exactly in the same way I have done it.


Picture
Here the apples are tossed with a mixture of white and brown sugars, nutmeg and cinnamon.  I used a combination of two parts light brown sugar and one part dark Muscovado sugars, which is not exactly Rose's recommendation, but I used what I had on hand.  It tasted fantastic!  

The apples are allowed to macerate with the sugars and spices for up to three hours.

I wanted to try some of the apples Rose suggested in the recipe, but apple season really isn't upon us yet, so I turned to an old family favorite combination of half Granny Smith and half Golden Delicious apples. This combination makes a great pie and the apples are readily available.  


(Note--these photos show a double batch of the pie filling.)


I usually make double batches of pie fillings that freeze well, and I ALWAYS make more than one pie crust at a time.  I love having pastry and pie fillings handy in the freezer, so that I can put together a wonderful dessert in a relatively short time-- it makes me feel downright RICH!  

Picture
Next the apples are drained in a colander.  The released juices, along with the sugars, are reduced in the microwave to create a thicker filling.

Picture
The fruit is tossed with the reduced juices, and also with a thickened apple cider mixture before being turned into the pie shell.

As much as I love her cream cheese pastry, I am partial to Rose's Deluxe Flaky All Butter Pie Crust from the Pie and Pastry Bible.


Picture
Time was working against me, so I froze the unbaked pie overnight. 

Here it is, frozen solid, wearing its foil ring to prevent over browning, slashed and ready for the oven.

That bouquet of basil is from Jessica's garden, by the way.  It has nothing to do with this pie, but it's so beautiful I included it in the photo!


Picture
The pie baked in about an hour at 425.  The crust was crisp, the apples soft but not mushy and the fragrance of apples and warm spices intoxicating!

The verdict? 


I love this pie!  It's similar to Jessica's signature pie recipe, but I really like Rose's method of concentrating the juices to increase the complexity of the fruit flavor.  

I will definitely make it again and will share it with Jessica!   

And now, a tip from one cook to another:


I love my FoodSaver vacuum sealing freezer bags for storing all sorts of things! To freeze a juicy pie filling like this, pour the filling into a regular plastic bag and freeze it solid.  Then cut the plastic bag away and slide the frozen pie filling into a vacuum freezer bag and seal it.  


FoodSaver bags keep pastry discs fresh in the freezer.  I also freeze specialty flours, nuts, marzipan and pre-measured amounts of berries in FoodSaver bags for freshness.

I store my raisins and other dried fruits in vacuum sealed bags.  What a difference!  The fruits stay moist and supple far longer than in ordinary plastic bags.  


Thanks so much for visiting and commenting on my blog!


NEXT UP: PEPPARKAKOR Cookies


3 Comments

    Archives

    August 2016
    September 2015
    August 2015
    July 2015
    May 2015
    April 2015
    March 2015
    February 2015
    January 2015
    December 2014

    Categories

    All

    RSS Feed

    Rose's blog HERE
    Rose's Alpha Bakers HERE
    Picture
Powered by Create your own unique website with customizable templates.